
Phone
+86-731-82250427
Address
25th floor, C3 Building, Wanda Plaza, Kaifu District, Changsha, Hunan Province, China.
 May 24 2023
1. Introduction of the main steel grades of high temperature resistant and high corrosion resistant alloys
(904L, 253MA, 254SM0, 800/800H, 825, 400, 600, 625, C276)
High-temperature resistant alloys are generally: 309S, 310S, 800, 825, 600, 625
High corrosion alloys are generally: 317L, 904L, 254SM0, 800/800H, 825, 400, 600, 625, C276
2. Introduction of knowledge related to work hardening
The phenomenon that metal materials increase in strength and hardness while plastically deforming below the recrystallization temperature, while plasticity and toughness decrease.
Also known as cold work hardening. The reason is that when the metal is plastically deformed, the grains slip, and tangles occur.
The grains are elongated, broken, and fibrillated, and residual stress is generated inside the metal. The degree of work hardening is usually
The ratio of the micro-hardness of the surface layer and the depth of the hardened layer after and before processing is expressed.
Work hardening causes difficulties in further processing of metal parts. For example, in the process of cold-rolling steel plates, the harder and harder the rolling.
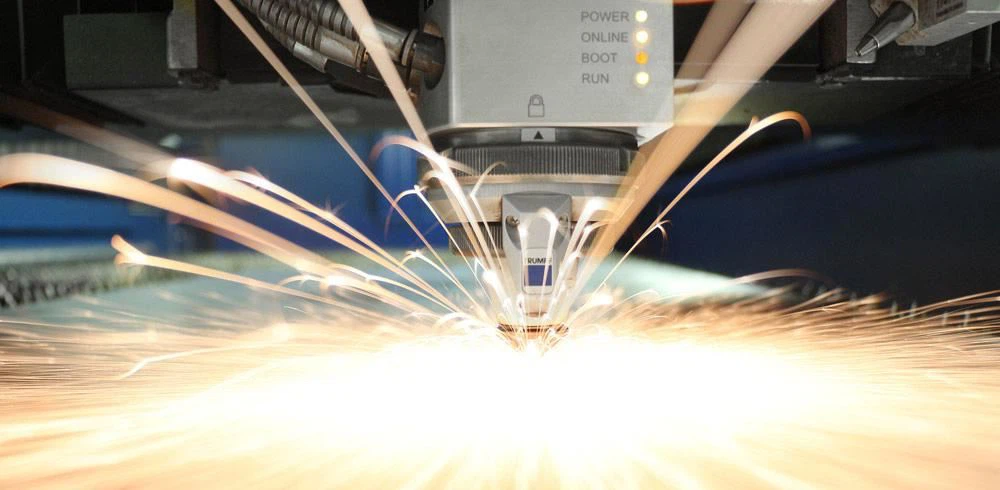
It does not move, so it is necessary to arrange intermediate annealing in the processing process to eliminate its work hardening by heating. Another example is cutting
The surface of the workpiece is brittle and hard during work, which accelerates tool wear and increases cutting force. But on the plus side, it can
Improve the strength, hardness and wear resistance of metals, especially for pure gold that cannot be improved by heat treatment
Genus and some alloys are particularly important. Such as cold-drawn high-strength steel wire and cold coil spring, etc., is to use cold working deformation to improve
High its strength and elastic limit. Another example is the tracks of tanks and tractors, the jaws of crushers, and railroad switches.
Work hardening is used to improve its hardness and wear resistance.
The role of work hardening in mechanical engineering is: ① After cold drawing, rolling and shot peening, it can significantly improve the metal
Surface strength of materials, parts, and components; ② After the parts are stressed, the local stress in some parts often exceeds the yield of the material
Limit, causing plastic deformation, because work hardening limits the continued development of plastic deformation, which can improve parts and components.
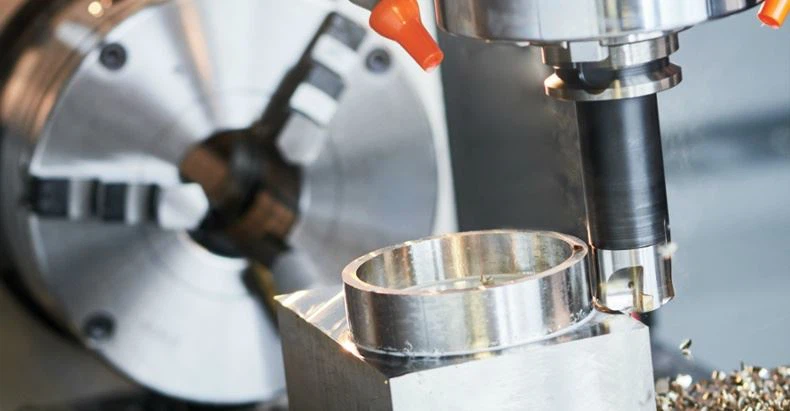
The degree of safety; ③ When metal parts or components are stamped, their plastic deformation is accompanied by strengthening so that the deformation is transferred to its
Unwork hardened parts around. After such repeated alternating action, uniformly deformed cold stamping parts can be obtained;
④It can improve the cutting performance of low carbon steel and make the chips easy to separate. But work-hardening also adds further to metal parts
Workers bring difficulties. Such as cold-drawn steel wire, due to work hardening, advanced-step drawing consumes a lot of energy and is even broken, so it is necessary
It must undergo intermediate annealing to eliminate work hardening before drawing. As another example, in cutting, work hardening makes the surface of the workpiece brittle
But hard, increase cutting force when cutting, accelerate tool wear, and so on.
Among stainless steel, the 300 series has a higher degree of work hardening.
Straightening machine leveling, microscopically also produce work hardening,-generally ignored.
3. Introduction of steel mechanical properties
1. Yield point (σs)
When the steel or specimen is stretched, when the stress exceeds the elastic limit, even if the stress no longer increases, the steel or specimen remains.
The obvious plastic deformation continues to occur, and this phenomenon is called yielding, and the minimum stress value when yielding occurs is.
Yield point.
Let Ps be the external force at the yield point s and Fo be the cross-sectional area of the sample, then the yield point σ s = Ps/Fo(MPa), MPa is called
Megapascal is equal to N (Newton)/mm2, (MPa=106Pa, Pa: Pascal=N/m2)
2. Yield strength (σ)
The yield point of some metallic materials is very insignificant, and it is difficult to measure, so in order to measure the yield characteristics of the material,
The stress required to produce permanent residual plastic deformation equal to-fixed value (usually% of the original length) is called conditional buckling
Yield strength or yield strength σ
3. Tensile strength (σb)
The maximum stress value reached by the material during the stretching process from the beginning to the moment when it breaks. It means that the steel resists breaking
The ability to crack. Corresponding to the tensile strength are compressive strength and flexural strength.
Let Pb be the maximum tensile force reached before the material is broken, and Fo be the cross-sectional area of the specimen, then the tensile strength σ b = Pb/Fo
(MPa).
4. Elongation (δs)
After the material is broken, the percentage of its plastic elongation to the original sample length is called elongation or elongation.
5. Yield strength ratio (σs/σb)
The ratio of the steel's yield point (yield strength) to tensile strength is called the yield strength ratio. The greater the yield strength ratio, the zero the structure
The higher the reliability of the parts, the general carbon steel yield strength ratio is, and the low alloy structural steel is alloy structural steel.
6. Hardness
Hardness indicates the ability of a material to resist the pressing of hard objects into its surface. It is one of the important performance indexes of metal materials.
Generally, the higher the hardness, the better the wear resistance. Commonly used hardness indexes are Brinell hardness, Rockwell hardness, and Vickers hardness.
(1) Brinell hardness (HB)
Press a certain size (diameter-generally 10mm) of hardened steel balls into the material with a certain load (generally 3000kg)
The surface of the material is kept for a period of time. After removing the load, the ratio of the load to the indentation area is the Brinell hardness value (HB).
The unit is kilogram-force/mm2 (N/mm2).
(2) Rockwell hardness (HR)
When HB>450 or the sample is too small, the Brinell hardness test cannot be used and the Rockwell hardness measurement is used instead. It is used
A diamond cone with a supporting angle of 120° or a steel ball with a diameter of 1× is pressed into the material under test under a certain load
On the surface, the hardness of the material is determined from the depth of the indentation. According to the different hardness of the test material, there are three different
Scale to express:
HRA: It is the hardness obtained by using a 60kg load and a diamond cone indenter. It is used for materials with extremely high hardness (such as hard
Carbide, etc.).
HRB: It is a hardened steel ball with a load of 100kg and a diameter. The hardness obtained is used for materials with lower hardness (eg.
Annealed steel, cast iron, etc.).
HRC: Hardness obtained with 150kg load and diamond cone indenter, used for materials with high hardness (such as quenching)
Fire Steel, etc.).
(3) Vickers hardness (HV)
Press the diamond square cone indenter with a load within 120kg and a support angle of 136° into the surface of the material.
The surface area of the material indentation pit divided by the load value is the Vickers hardness value (HV).
4. Introduction to Steel Annealing
1. Types of annealing
1. Complete annealing and isothermal annealing
Complete annealing is also called recrystallization annealing, generally referred to as annealing, this kind of annealing is mainly used for sub-eutectoid composition
Various carbon steel and alloy steel castings, forgings, and hot-rolled profiles are sometimes used for welding structures. Usually used as
The final heat treatment of some heavy workpieces, or as the pre-heat treatment of some workpieces.
2. Spheroidizing annealing
Spheroidizing annealing is mainly used for hypereutectoid carbon steel and alloy tool steel (such as used in manufacturing cutting tools, measuring tools, molds)
Type of steel)
The main purpose is to reduce the hardness, improve the machinability, and prepare for the subsequent quenching.
3. Stress relief annealing
Stress relief annealing is also called low-temperature annealing (or high-temperature tempering). This kind of annealing is mainly used to eliminate castings and forgings.
Residual stress of welded parts, hot-rolled parts, cold drawn parts, etc. If these stresses are not eliminated, it will cause steel
After a certain period of time, or in the subsequent cutting process, deformation or cracks occur.
During quenching, the most commonly used cooling media are brine, water, and oil.
The workpiece quenched with salt water is easy to get a high hardness and smooth surface, and it is not easy to produce soft spots that are not hardened.
But it is easy to make the workpiece deform seriously and even crack. The use of oil as the quenching medium is only suitable for supercooled austenite
The stability of some alloy steel or small size carbon steel workpieces is relatively large for quenching.
Third, the purpose of steel tempering
Reduce brittleness, eliminate or reduce internal stress, there is a lot of internal stress and brittleness after quenching of steel parts, if not returned in time
Fire often deforms or cracks steel parts.
V. Summary of common defect types on the stainless steel surface
1. Slit 1 is a linear defect in the entire length of the steel coil within 20 mm of the hot-rolled edges on both sides of the steel coil. Nissin
Raw material_ This defect is wider on the upper surface and narrower on the lower surface. So the new lower surface is used as a cold-rolled single-sided guarantee Datum.

V. Summary of common defect types on the stainless steel surface
1. Slit-
Linear defects in the entire length of the steel coil within 20M of the hot-rolled edges on both sides of the steel coil. Nissin
Raw material_ This defect is wider on the upper surface and narrower on the lower surface. So the new lower surface is used as a cold-rolled single-sided guarantee
Datum.
2. Oxidation line-the material plate surface has linear defects caused by rolling residual oxides, which are somewhat related to inclusion defects
like;
3. Qiao (dropped oxide skin) is tongue-shaped or fish-scale, some are closed and some are open. There are most of them and some of them.
Connected to the body.
4. Inclusions one by one have obvious dot-shaped, block-shaped, strip-shaped willow-shaped obvious characteristics.
5. Underline
During processing, there can be seen single or multiple strips on the surface of the material, but there are many scratches without feeling;
6. Scratch-
During processing, there can be seen single or multiple strip-shaped dots on the surface of the material and scratches with feel;
7. Bruise-
The material plate surface produces large material deformation under the action of external force;
8. Sliding between layers (slip on both sides)-- The same shape, small and dense occurs at the symmetrical position on both sides of the steel coil
Set scars. Due to the loose curl between the board.
9. Crease one-to-one During processing, the board surface produces less material deformation under the action of external force;
10. When the paper indentation is processed one by one, the material deformation caused by the paper wrinkles on the board surface;
11. Burr 1--plastic deformation formed in the lower part of the material fracture surface during processing (the flat plate is the end of the burr ??? ?? ??
(Up,-end down);
12. Collapse (collapse)--plastic bending deformation formed on the upper part of the material shear bright band during processing;
13. Linear scale folding-the The surface defects of the steel coil are linearly peeled off, some are covered by the film, and some are not covered
cover.
14. The scaly side folds-
-Linear or mountain-shaped scale peeling that occurs within 50 mm of the rolled edge of the steel coil,
Parallel to the rolling direction, continuous or intermittent.
15. Yamagata scale folding-
-The surface of the steel coil has a mountain-shaped peeling defect, and the location of the steel coil has no characteristics. The direction of the mountain and the rolling
The directions are parallel.
16. The hot-rolled head slips one by one. There are slip wounds on both sides of the hot-rolled coil head about 5 meters.
17. Oxide scale defect 1-more occur on the lower surface of the hot-rolled head and tail, which is oblong and more inside material is concave
Lower shape.
18. Stop roller printing 1-A dent perpendicular to the rolling direction occurs on the surface of the steel strip.
19. Leveling roller mark 1-In the rolling direction of the steel plate, the concave and convex flaws are produced with the circumference of the SPM work roll as the interval.
20. Roll marks one by one in the longitudinal direction of the steel plate, with irregularities on the circumference of the CRM work roll as intervals; the middle
Roll printing, support roller printing: there are no cycles in the length direction, and it is a straight line of uneven scars
21. Edge wave one-the wave shape deformation that occurs on one or both sides of the steel coil
22. Pit one-caused by the bite of irregularly shaped debris that often occurs during hot rolling, the location of the occurrence is not fixed
23. The cooling water spots of the pyrometer have white spots on the surface of the strip. The color of the empty part in the middle is the same as the strip.
24. Oxygen residual mono-oxide scale is not fully removed, there are residues on the surface, and the defects are black, irregular oxides
25. White spots One by one on the surface of the steel strip White spots occur irregularly
26. Holes-
.The holes penetrated on both the front and back sides of the steel coil are more common on ferritic single-phase steel
27. Side waves:
The extension of one or both sides of the steel plate is greater than the extension of the middle, and the high side of the edge is uneven.
28. Cloud pattern-
-Cloud-like patterns that occur on NI steel-grades
29. Pickling pattern:
Local whitening or brown patterns caused by incomplete pickling, rinsing and brushing
30. Herringbone pattern--a herringbone wavy pattern that appears symmetrically on both sides of the centerline of the steel plate and forms a certain direction with the rolling direction
angle.
31. Oil pattern 1-speckled irregular pattern similar to the pattern on the surface of galvanized sheet, or a pattern like raindrops.
32. Remains of pickled patterns—the residue of white and brown patterns on the surface of the steel strip is partially or completely
33. The oil film ruptures one by one, which developed from slippage or rain, and occurred on the surface of the strip.
34. Oil stains appear wavy and whitish patterns on both sides of the steel belt.
35. Edge damage (folding) (edge bruise) One-to-one when the edge of the steel coil is severely bent, the angle is greater than 90 degrees and is accompanied by
There is a crack:
6. Factors to be considered for stainless steel selection
The factors to be considered for stainless steel selection are:
◆Corrosion performance
Consider the corrosion resistance requirements of different steel types in different corrosive media.
◆>Mechanical properties and physical properties
Including strength, hardness, plasticity, toughness, fatigue characteristics, etc.
◆Process performance
Various bending, cold and hot breaks, welding performance, stamping performance.
◆Resources, prices, and supply
Price, economy.
Selection of stainless steel --- simple selection
◆Atmospheric environment
The general atmospheric environment is 409L, 405 (0Cr13Al), or 304 series.
◆Aqueous medium
Generally choose 304, control N-type 304, 316 types, etc. can be resistant to chloride-ion corrosion, as the tool can also choose Cr13 type. in
In the seawater, steel grades with high Cr and Ni containing Mo, or duplex steels should be selected.
◆Nitric acid medium
In dilute nitric acid (≤65%), generally 18-8 has good nitric acid corrosion resistance; as the concentration increases,
When it reaches more than %, Cr25Ni20 steel can be selected, and at high concentration (>85%), high Cr containing Si needs to be used
Austenitic stainless steel.
Mo-containing stainless steels are generally not used to resist nitric acid corrosion.
>sulfuric acid medium
The stainless steel without Mo cannot be used for sulfuric acid corrosion resistance, while the 316 series containing Mo2-3% is resistant to sulfuric acid corrosion.
The lowest grade of Mo-containing dual-phase steel is also equivalent to or better than 316 series; with the increase of sulfuric acid concentration, high
Cr, Ni, austenitic stainless steel containing Cu, and Si (0Cr23Ni28Mo3CuTi, etc.).
◆Hydrochloric acid medium
Hydrochloric acid medium has strong reducibility, and stainless steel is difficult to passivate. High dilute hydrochloric acid needs to use high Cr, Ni, Cu, Si-containing Austrian
Austenitic stainless steel. The 304 series cannot be selected.
◆Organic acid
-Generally choose Cr17 type, or Mo-containing austenitic stainless steel, etc.
◆Alkali media
Choose pure ferritic stainless steel containing Cr≥26% or Cr-Ni austenitic stainless steel containing Ni≥20%. 00Cr26Mo1
(446)
◆Phosphoric acid
316,317, duplex, high purity ferritic stainless steel.
<>HF
When containing oxygen or oxidant, use high Ni Cr-Ni-Mo-Cu austenitic stainless steel
◆Urea methylamine liquid medium
00Cr25Ni22Mo2N (2RE69) is better than 316LUG.
Consequences of incorrectly guiding customers in material selection:
1. The material purchased by the customer is cracked or corroded
2. The awareness is too advanced, the products processed by customers are not bad for 100 years, and standard resources are wasted. So-called enough~
◆Alkali media
Choose pure ferritic stainless steel containing Cr≥26% or Cr-Ni austenitic stainless steel containing Ni≥20%. 00Cr26Mol
(446)
◆Phosphoric acid
316,317, duplex, high purity ferritic stainless steel.
◆HF
When containing oxygen or oxidant, use high Ni Cr-Ni-Mo-Cu austenitic stainless steel
◆Urea methylamine liquid medium
00Cr25Ni22Mo2N (2RE69) is better than 316LUG.
